![]()

チュートリアル 1: PyTorch
第1週、第1日目: 基礎とPyTorch
Neuromatch Academyによる
コンテンツ作成者: Shubh Pachchigar, Vladimir Haltakov, Matthew Sargent, Konrad Kording
コンテンツレビュアー: Deepak Raya, Siwei Bai, Kelson Shilling-Scrivo
コンテンツ編集者: Anoop Kulkarni, Spiros Chavlis
制作編集者: Arush Tagade, Spiros Chavlis
チュートリアルの目的
このチュートリアルの具体的な目的は以下の通りです:
- PyTorchとテンソルについて学ぶ
- テンソル操作
- データの読み込み
- GPUとCUDAテンソル
- NaiveNetの訓練
- 自分のポッドを知る
- コース全体について考え始める
# @title Tutorial slides
from IPython.display import IFrame
link_id = "wcjrv"
print(f"If you want to download the slides: https://osf.io/download/{link_id}/")
IFrame(src=f"https://mfr.ca-1.osf.io/render?url=https://osf.io/{link_id}/?direct%26mode=render%26action=download%26mode=render", width=854, height=480)
セットアップ
Neuromatchのチュートリアルでは、ほとんど(おそらくすべての)ノートブックにセットアップセルが含まれています。これらのセルは必要なPythonパッケージ(例:PyTorch、NumPy)をインポートし、グローバルまたは環境変数を設定し、プロットなどのためのヘルパー関数を読み込みます。いくつかのチュートリアルでは、Google ColabやKaggleに既にインストールされている依存関係もインストールすることがあります。これは、GitHub Actionsを通じてリポジトリに自動化を追加しているためです。
セットアップセクションのすべてのセルを必ず実行してください。展開して読み込んでいる内容を確認しても構いませんが、これらのセルを見なくても各チュートリアルの学習目標を達成できるはずです。
このコードベースを使って独自のプロジェクトを構築し始める場合は、これらのセルをより詳しく見ることを強くお勧めします。
# @title Install dependencies# @title Install and import feedback gadget
from vibecheck import DatatopsContentReviewContainer
def content_review(notebook_section: str):
return DatatopsContentReviewContainer(
"", # No text prompt
notebook_section,
{
"url": "https://pmyvdlilci.execute-api.us-east-1.amazonaws.com/klab",
"name": "neuromatch_dl",
"user_key": "f379rz8y",
},
).render()
feedback_prefix = "W1D1_T1"# Imports
import time
import random
import numpy as np
import pandas as pd
import matplotlib.pyplot as plt
# PyTorch libraries
import torch
from torch import nn
from torchvision import datasets
from torch.utils.data import DataLoader
from torchvision.transforms import ToTensor# @title Figure Settings
import logging
logging.getLogger('matplotlib.font_manager').disabled = True
import ipywidgets as widgets
%config InlineBackend.figure_format = 'retina'
plt.style.use("https://raw.githubusercontent.com/NeuromatchAcademy/content-creation/main/nma.mplstyle")# @title Helper Functions
def checkExercise1(A, B, C, D):
"""
Helper function for checking Exercise 1.
Args:
A: torch.Tensor
Torch Tensor of shape (20, 21) consisting of ones.
B: torch.Tensor
Torch Tensor of size([3,4])
C: torch.Tensor
Torch Tensor of size([20,21])
D: torch.Tensor
Torch Tensor of size([19])
Returns:
Nothing.
"""
assert torch.equal(A.to(int),torch.ones(20, 21).to(int)), "Got: {A} \n Expected: {torch.ones(20, 21)} (shape: {torch.ones(20, 21).shape})"
assert np.array_equal(B.numpy(),np.vander([1, 2, 3], 4)), "Got: {B} \n Expected: {np.vander([1, 2, 3], 4)} (shape: {np.vander([1, 2, 3], 4).shape})"
assert C.shape == (20, 21), "Got: {C} \n Expected (shape: {(20, 21)})"
assert torch.equal(D, torch.arange(4, 41, step=2)), "Got {D} \n Expected: {torch.arange(4, 41, step=2)} (shape: {torch.arange(4, 41, step=2).shape})"
print("All correct")
def timeFun(f, dim, iterations, device='cpu'):
"""
Helper function to calculate amount of time taken per instance on CPU/GPU
Args:
f: BufferedReader IO instance
Function name for which to calculate computational time complexity
dim: Integer
Number of dimensions in instance in question
iterations: Integer
Number of iterations for instance in question
device: String
Device on which respective computation is to be run
Returns:
Nothing
"""
iterations = iterations
t_total = 0
for _ in range(iterations):
start = time.time()
f(dim, device)
end = time.time()
t_total += end - start
if device == 'cpu':
print(f"time taken for {iterations} iterations of {f.__name__}({dim}, {device}): {t_total:.5f}")
else:
print(f"time taken for {iterations} iterations of {f.__name__}({dim}, {device}): {t_total:.5f}")重要な注意: Colabユーザーへ
スクラッチコードセル
何かをすばやく試したりデータを確認したい場合は、スクラッチコードセルを使うことができます。これによりPythonコードを実行できますが、ノートブックの構造を乱すことはありません。
新しいスクラッチセルを開くには、メニューの挿入 → スクラッチコードセルを選択してください。
セクション 1: Neuromatch Deep Learningコースへようこそ
所要時間の目安: 約25分
# @title Video 1: Welcome and History
from ipywidgets import widgets
from IPython.display import YouTubeVideo
from IPython.display import IFrame
from IPython.display import display


class PlayVideo(IFrame):
  def __init__(self, id, source, page=1, width=400, height=300, **kwargs):
    self.id = id
    if source == 'Bilibili':
      src = f'https://player.bilibili.com/player.html?bvid={id}&page={page}'
    elif source == 'Osf':
      src = f'https://mfr.ca-1.osf.io/render?url=https://osf.io/download/{id}/?direct%26mode=render'
    super(PlayVideo, self).__init__(src, width, height, **kwargs)


def display_videos(video_ids, W=400, H=300, fs=1):
  tab_contents = []
  for i, video_id in enumerate(video_ids):
    out = widgets.Output()
    with out:
      if video_ids[i][0] == 'Youtube':
        video = YouTubeVideo(id=video_ids[i][1], width=W,
                             height=H, fs=fs, rel=0)
        print(f'Video available at https://youtube.com/watch?v={video.id}')
      else:
        video = PlayVideo(id=video_ids[i][1], source=video_ids[i][0], width=W,
                          height=H, fs=fs, autoplay=False)
        if video_ids[i][0] == 'Bilibili':
          print(f'Video available at https://www.bilibili.com/video/{video.id}')
        elif video_ids[i][0] == 'Osf':
          print(f'Video available at https://osf.io/{video.id}')
      display(video)
    tab_contents.append(out)
  return tab_contents


video_ids = [('Youtube', 'ca21SNqt78I'), ('Bilibili', 'BV1Av411n7oL')]
tab_contents = display_videos(video_ids, W=854, H=480)
tabs = widgets.Tab()
tabs.children = tab_contents
for i in range(len(tab_contents)):
  tabs.set_title(i, video_ids[i][0])
display(tabs)
これは3週間の集中的な冒険になります。私たちは皆でグループとしてディープラーニング(DL)を学びます。グループにはルールが必要です。私たちの
行動規範をお読みください。
# @title Submit your feedback
content_review(f"{feedback_prefix}_Welcome_and_History_Video")
# @title Video 2: Why DL is cool
from ipywidgets import widgets
from IPython.display import YouTubeVideo
from IPython.display import IFrame
from IPython.display import display
class PlayVideo(IFrame):
def __init__(self, id, source, page=1, width=400, height=300, **kwargs):
self.id = id
if source == 'Bilibili':
src = f'https://player.bilibili.com/player.html?bvid={id}&page={page}'
elif source == 'Osf':
src = f'https://mfr.ca-1.osf.io/render?url=https://osf.io/download/{id}/?direct%26mode=render'
super(PlayVideo, self).__init__(src, width, height, **kwargs)
def display_videos(video_ids, W=400, H=300, fs=1):
tab_contents = []
for i, video_id in enumerate(video_ids):
out = widgets.Output()
with out:
if video_ids[i][0] == 'Youtube':
video = YouTubeVideo(id=video_ids[i][1], width=W,
height=H, fs=fs, rel=0)
print(f'Video available at https://youtube.com/watch?v={video.id}')
else:
video = PlayVideo(id=video_ids[i][1], source=video_ids[i][0], width=W,
height=H, fs=fs, autoplay=False)
if video_ids[i][0] == 'Bilibili':
print(f'Video available at https://www.bilibili.com/video/{video.id}')
elif video_ids[i][0] == 'Osf':
print(f'Video available at https://osf.io/{video.id}')
display(video)
tab_contents.append(out)
return tab_contents
video_ids = [('Youtube', 'l-K6495BN-4'), ('Bilibili', 'BV1gf4y1j7UZ')]
tab_contents = display_videos(video_ids, W=854, H=480)
tabs = widgets.Tab()
tabs.children = tab_contents
for i in range(len(tab_contents)):
tabs.set_title(i, video_ids[i][0])
display(tabs)ポッドのメンバーと話し合ってください: このコースから何を得たいですか?【約100字程度】
# @title Submit your feedback
content_review(f"{feedback_prefix}_Why_DL_is_cool_Video")
セクション 2: PyTorchの基礎
所要時間の目安: 約2時間5分
PyTorchはPythonベースの科学計算パッケージで、主に2つの対象ユーザー向けに設計されています:
- GPUの力を活かしたNumPyの代替
- 柔軟性と高速性を備えたディープラーニングプラットフォーム
PyTorchのコアにはいくつかの重要な特徴があります:
- NumPy配列に似た多次元のテンソルオブジェクト(GPUアクセラレーション対応)
- 自動微分を行う最適化されたautogradエンジン
- ディープラーニングモデルの構築と展開のためのクリーンでモジュール化されたAPI
PyTorchの詳細は付録をご覧ください。
セクション 2.1: テンソルの作成
# @title Video 3: Making Tensors
from ipywidgets import widgets
from IPython.display import YouTubeVideo
from IPython.display import IFrame
from IPython.display import display


class PlayVideo(IFrame):
  def __init__(self, id, source, page=1, width=400, height=300, **kwargs):
    self.id = id
    if source == 'Bilibili':
      src = f'https://player.bilibili.com/player.html?bvid={id}&page={page}'
    elif source == 'Osf':
      src = f'https://mfr.ca-1.osf.io/render?url=https://osf.io/download/{id}/?direct%26mode=render'
    super(PlayVideo, self).__init__(src, width, height, **kwargs)


def display_videos(video_ids, W=400, H=300, fs=1):
  tab_contents = []
  for i, video_id in enumerate(video_ids):
    out = widgets.Output()
    with out:
      if video_ids[i][0] == 'Youtube':
        video = YouTubeVideo(id=video_ids[i][1], width=W,
                             height=H, fs=fs, rel=0)
        print(f'Video available at https://youtube.com/watch?v={video.id}')
      else:
        video = PlayVideo(id=video_ids[i][1], source=video_ids[i][0], width=W,
                          height=H, fs=fs, autoplay=False)
        if video_ids[i][0] == 'Bilibili':
          print(f'Video available at https://www.bilibili.com/video/{video.id}')
        elif video_ids[i][0] == 'Osf':
          print(f'Video available at https://osf.io/{video.id}')
      display(video)
    tab_contents.append(out)
  return tab_contents


video_ids = [('Youtube', 'jGKd_4tPGrw'), ('Bilibili', 'BV1Rw411d7Uy')]
tab_contents = display_videos(video_ids, W=854, H=480)
tabs = widgets.Tab()
tabs.children = tab_contents
for i in range(len(tab_contents)):
  tabs.set_title(i, video_ids[i][0])
display(tabs)
# @title Submit your feedback
content_review(f"{feedback_prefix}_Making_Tensors_Video")テンソルを作成する方法はいくつかあり、実際のディープラーニングプロジェクトでは通常これらを使い分けます。
テンソルを直接構築する:
# We can construct a tensor directly from some common python iterables,
# such as list and tuple nested iterables can also be handled as long as the
# dimensions are compatible

# tensor from a list
a = torch.tensor([0, 1, 2])

#tensor from a tuple of tuples
b = ((1.0, 1.1), (1.2, 1.3))
b = torch.tensor(b)

# tensor from a numpy array
c = np.ones([2, 3])
c = torch.tensor(c)

print(f"Tensor a: {a}")
print(f"Tensor b: {b}")
print(f"Tensor c: {c}")
よく使われるテンソルのコンストラクタ:
# The numerical arguments we pass to these constructors
# determine the shape of the output tensor

x = torch.ones(5, 3)
y = torch.zeros(2)
z = torch.empty(1, 1, 5)
print(f"Tensor x: {x}")
print(f"Tensor y: {y}")
print(f"Tensor z: {z}").empty()はゼロを返すのではなく、一見ランダムな値を返すことに注意してください。.zeros()はテンソルの要素をゼロで初期化しますが、.empty()は単にメモリを割り当てるだけです。そのため、単にテンソルを作成したい場合は少し高速です。
ランダムテンソルや他のテンソルに似たテンソルの作成:
# There are also constructors for random numbers

# Uniform distribution
a = torch.rand(1, 3)

# Normal distribution
b = torch.randn(3, 4)

# There are also constructors that allow us to construct
# a tensor according to the above constructors, but with
# dimensions equal to another tensor.

c = torch.zeros_like(a)
d = torch.rand_like(c)

print(f"Tensor a: {a}")
print(f"Tensor b: {b}")
print(f"Tensor c: {c}")
print(f"Tensor d: {d}")再現性:
- PyTorchの乱数生成器(RNG): を使うと、すべてのデバイス(CPUとGPU両方)のRNGにシードを設定できます:
import torch
torch.manual_seed(0)
- カスタムオペレーターの場合はPythonのシードも設定する必要があるかもしれません:
import random
random.seed(0)
- 他のライブラリ(例:NumPy)の乱数生成器:
import numpy as np
np.random.seed(0)
ここでは、set_seedという関数を定義しました。これを使うと上記の処理をまとめて行えます!
def set_seed(seed=None, seed_torch=True):
  """
  Function that controls randomness. NumPy and random modules must be imported.

  Args:
    seed : Integer
      A non-negative integer that defines the random state. Default is `None`.
    seed_torch : Boolean
      If `True` sets the random seed for pytorch tensors, so pytorch module
      must be imported. Default is `True`.

  Returns:
    Nothing.
  """
  if seed is None:
    seed = np.random.choice(2 ** 32)
  random.seed(seed)
  np.random.seed(seed)
  if seed_torch:
    torch.manual_seed(seed)
    torch.cuda.manual_seed_all(seed)
    torch.cuda.manual_seed(seed)
    torch.backends.cudnn.benchmark = False
    torch.backends.cudnn.deterministic = True

print(f'Random seed {seed} has been set.')それでは、先ほどの例でset_seed関数を使ってみましょう。セルを何度も実行して、出力される数字が常に同じであることを確認してください。
def simplefun(seed=True, my_seed=None):
  """
  Helper function to verify effectiveness of set_seed attribute

  Args:
    seed: Boolean
      Specifies if seed value is provided or not
    my_seed: Integer
      Initializes seed to specified value

  Returns:
    Nothing
  """
  if seed:
    set_seed(seed=my_seed)

  # uniform distribution
  a = torch.rand(1, 3)
  # normal distribution
  b = torch.randn(3, 4)

  print("Tensor a: ", a)
  print("Tensor b: ", b)
simplefun(seed=True, my_seed=0) # Turn `seed` to `False` or change `my_seed`Numpy風の数値範囲:
.arange()と.linspace()は、numpyに慣れていれば期待通りに動作します。
a = torch.arange(0, 10, step=1)
b = np.arange(0, 10, step=1)

c = torch.linspace(0, 5, steps=11)
d = np.linspace(0, 5, num=11)

print(f"Tensor a: {a}\n")
print(f"Numpy array b: {b}\n")
print(f"Tensor c: {c}\n")
print(f"Numpy array d: {d}\n")
コーディング演習 2.1: テンソルの作成
以下に不完全なコードがあります。指定されたテンソルを作成するために欠けているコードを埋めてください。
作成したいテンソルは:
20行21列のすべての要素が1のテンソル
numpy配列の要素と等しいテンソル
と同じ要素数を持ち、値が一様分布に従うテンソル
4から40までの偶数を含む1次元テンソル
: はからまでの一様分布で、です。
def tensor_creation(Z):
  """
  A function that creates various tensors.

  Args:
    Z: numpy.ndarray
      An array of shape (3,4)

  Returns:
    A : Tensor
      20 by 21 tensor consisting of ones
    B : Tensor
      A tensor with elements equal to the elements of numpy array Z
    C : Tensor
      A tensor with the same number of elements as A but with values ∼U(0,1)
    D : Tensor
      A 1D tensor containing the even numbers between 4 and 40 inclusive.
  """
  #################################################
  ## TODO for students: fill in the missing code
  ## from the first expression
  raise NotImplementedError("Student exercise: say what they should have done")
  #################################################
  A = ...
  B = ...
  C = ...
  D = ...

  return A, B, C, D


# numpy array to copy later
Z = np.vander([1, 2, 3], 4)

# Uncomment below to check your function!
# A, B, C, D = tensor_creation(Z)
# checkExercise1(A, B, C, D)すべて正解です!
# @title Submit your feedback
content_review(f"{feedback_prefix}_Creating_Tensors_Exercise")
セクション 2.2: PyTorchでの演算
テンソル-テンソル演算
torch.の下にあるメソッドを使ってテンソル同士の演算ができます。
# @title Video 4: Tensor Operators
from ipywidgets import widgets
from IPython.display import YouTubeVideo
from IPython.display import IFrame
from IPython.display import display


class PlayVideo(IFrame):
  def __init__(self, id, source, page=1, width=400, height=300, **kwargs):
    self.id = id
    if source == 'Bilibili':
      src = f'https://player.bilibili.com/player.html?bvid={id}&page={page}'
    elif source == 'Osf':
      src = f'https://mfr.ca-1.osf.io/render?url=https://osf.io/download/{id}/?direct%26mode=render'
    super(PlayVideo, self).__init__(src, width, height, **kwargs)


def display_videos(video_ids, W=400, H=300, fs=1):
  tab_contents = []
  for i, video_id in enumerate(video_ids):
    out = widgets.Output()
    with out:
      if video_ids[i][0] == 'Youtube':
        video = YouTubeVideo(id=video_ids[i][1], width=W,
                             height=H, fs=fs, rel=0)
        print(f'Video available at https://youtube.com/watch?v={video.id}')
      else:
        video = PlayVideo(id=video_ids[i][1], source=video_ids[i][0], width=W,
                          height=H, fs=fs, autoplay=False)
        if video_ids[i][0] == 'Bilibili':
          print(f'Video available at https://www.bilibili.com/video/{video.id}')
        elif video_ids[i][0] == 'Osf':
          print(f'Video available at https://osf.io/{video.id}')
      display(video)
    tab_contents.append(out)
  return tab_contents


video_ids = [('Youtube', 'R1R8VoYXBVA'), ('Bilibili', 'BV1G44y127As')]
tab_contents = display_videos(video_ids, W=854, H=480)
tabs = widgets.Tab()
tabs.children = tab_contents
for i in range(len(tab_contents)):
  tabs.set_title(i, video_ids[i][0])
display(tabs)
# @title Submit your feedback
content_review(f"{feedback_prefix}_Tensors_Operators_Video")テンソル-テンソル演算
torch.の下にあるメソッドを使ってテンソル同士の演算ができます。
a = torch.ones(5, 3)
b = torch.rand(5, 3)
c = torch.empty(5, 3)
d = torch.empty(5, 3)

# this only works if c and d already exist
torch.add(a, b, out=c)

# Pointwise Multiplication of a and b
torch.multiply(a, b, out=d)

print(c)
print(d)
しかし、PyTorchでは多くの一般的なPython演算子がオーバーライドされています。
一般的な算術演算子(, , , , )はすべて要素ごとの演算に拡張されています。
x = torch.tensor([1, 2, 4, 8])
y = torch.tensor([1, 2, 3, 4])
x + y, x - y, x * y, x / y, x**y  # The `**` is the exponentiation operator
テンソルのメソッド
テンソルには多くの一般的な算術演算が組み込まれています。すべてのメソッドのリストは付録にあります(非常に多いです!)。
これらの演算はすべてnumpyの対応する構文に似ています(すでに知っている場合は飛ばしても構いません)。
x = torch.rand(3, 3)
print(x)
print("\n")
# sum() - note the axis is the axis you move across when summing
print(f"Sum of every element of x: {x.sum()}")
print(f"Sum of the columns of x: {x.sum(axis=0)}")
print(f"Sum of the rows of x: {x.sum(axis=1)}")
print("\n")

print(f"Mean value of all elements of x {x.mean()}")
print(f"Mean values of the columns of x {x.mean(axis=0)}")
print(f"Mean values of the rows of x {x.mean(axis=1)}")
行列演算
@記号は行列積を表すようにオーバーライドされています。テンソルの掛け算にはtorch.matmul()も使えます。ドット積にはtorch.dot()を使うか、テンソルの軸を操作して行列積を行うこともできます(次のセクションで扱います)。
2次元テンソルの転置はtorch.t()またはTensor.Tで得られます。Tensor.Tはメソッドではなく属性なので括弧は不要です。
コーディング演習 2.2 : 簡単なテンソル演算
以下は行列の演算を含む2つの式です。
と
これらの式をPyTorchで計算するコードブロックが不完全です。欠けている行を埋めてください。
def simple_operations(a1: torch.Tensor, a2: torch.Tensor, a3: torch.Tensor):
  """
  Helper function to demonstrate simple operations
  i.e., Multiplication of tensor a1 with tensor a2 and then add it with tensor a3

  Args:
    a1: Torch tensor
      Tensor of size ([2,2])
    a2: Torch tensor
      Tensor of size ([2,2])
    a3: Torch tensor
      Tensor of size ([2,2])

  Returns:
    answer: Torch tensor
      Tensor of size ([2,2]) resulting from a1 multiplied with a2, added with a3
  """
  ################################################
  ## TODO for students:  complete the first computation using the argument matricies
  raise NotImplementedError("Student exercise: fill in the missing code to complete the operation")
  ################################################
  #
  answer = ...
  return answer


# Computing expression 1:

# init our tensors
a1 = torch.tensor([[2, 4], [5, 7]])
a2 = torch.tensor([[1, 1], [2, 3]])
a3 = torch.tensor([[10, 10], [12, 1]])
## uncomment to test your function
# A = simple_operations(a1, a2, a3)
# print(A)tensor([[20, 24],
[31, 27]])
def dot_product(b1: torch.Tensor, b2: torch.Tensor):
  ###############################################
  ## TODO for students:  complete the first computation using the argument matricies
  raise NotImplementedError("Student exercise: fill in the missing code to complete the operation")
  ###############################################
  """
  Helper function to demonstrate dot product operation
  Dot product is an algebraic operation that takes two equal-length sequences
  (usually coordinate vectors), and returns a single number.
  Geometrically, it is the product of the Euclidean magnitudes of the
  two vectors and the cosine of the angle between them.

  Args:
    b1: Torch tensor
      Tensor of size ([3])
    b2: Torch tensor
      Tensor of size ([3])

  Returns:
    product: Tensor
      Tensor of size ([1]) resulting from b1 scalar multiplied with b2
  """
  # Use torch.dot() to compute the dot product of two tensors
  product = ...
  return product


# Computing expression 2:
b1 = torch.tensor([3, 5, 7])
b2 = torch.tensor([2, 4, 8])
## Uncomment to test your function
# b = dot_product(b1, b2)
# print(b)tensor(82)
# @title Submit your feedback
content_review(f"{feedback_prefix}_Simple_Tensor_Operations_Exercise")
セクション 2.3: PyTorchでのテンソル操作
# @title Video 5: Tensor Indexing
from ipywidgets import widgets
from IPython.display import YouTubeVideo
from IPython.display import IFrame
from IPython.display import display


class PlayVideo(IFrame):
  def __init__(self, id, source, page=1, width=400, height=300, **kwargs):
    self.id = id
    if source == 'Bilibili':
      src = f'https://player.bilibili.com/player.html?bvid={id}&page={page}'
    elif source == 'Osf':
      src = f'https://mfr.ca-1.osf.io/render?url=https://osf.io/download/{id}/?direct%26mode=render'
    super(PlayVideo, self).__init__(src, width, height, **kwargs)


def display_videos(video_ids, W=400, H=300, fs=1):
  tab_contents = []
  for i, video_id in enumerate(video_ids):
    out = widgets.Output()
    with out:
      if video_ids[i][0] == 'Youtube':
        video = YouTubeVideo(id=video_ids[i][1], width=W,
                             height=H, fs=fs, rel=0)
        print(f'Video available at https://youtube.com/watch?v={video.id}')
      else:
        video = PlayVideo(id=video_ids[i][1], source=video_ids[i][0], width=W,
                          height=H, fs=fs, autoplay=False)
        if video_ids[i][0] == 'Bilibili':
          print(f'Video available at https://www.bilibili.com/video/{video.id}')
        elif video_ids[i][0] == 'Osf':
          print(f'Video available at https://osf.io/{video.id}')
      display(video)
    tab_contents.append(out)
  return tab_contents


video_ids = [('Youtube', '0d0KSJ3lJbg'), ('Bilibili', 'BV1BM4y1K7pD')]
tab_contents = display_videos(video_ids, W=854, H=480)
tabs = widgets.Tab()
tabs.children = tab_contents
for i in range(len(tab_contents)):
  tabs.set_title(i, video_ids[i][0])
display(tabs)
# @title Submit your feedback
content_review(f"{feedback_prefix}_Manipulating_Tensors_Video")インデックス指定
numpyと同様に、テンソルの要素はインデックスでアクセスできます。最初の要素はインデックス0で、範囲指定は最初の要素から最後の要素の1つ前までを含みます。負のインデックスを使うとリストの末尾からの相対位置でアクセスできます。インデックス指定はスライスとも呼ばれます。
例えば、[-1]は最後の要素を選択し、[1:3]は2番目と3番目の要素を選択し、[:-2]は最後と最後から2番目の要素を除いたすべての要素を選択します。
x = torch.arange(0, 10)
print(x)
print(x[-1])
print(x[1:3])
print(x[:-2])
多次元テンソルの場合も、インデックス指定のルールはNumPyと同じです。
# make a 5D tensor
x = torch.rand(1, 2, 3, 4, 5)

print(f" shape of x[0]:{x[0].shape}")
print(f" shape of x[0][0]:{x[0][0].shape}")
print(f" shape of x[0][0][0]:{x[0][0][0].shape}")
フラット化とリシェイプ
テンソルの形状を変える方法はいくつかあります。2次元データを1次元に表現したり、逆に1次元テンソルを2次元に変形したりすることはよくあります。これらは.flatten()や.reshape()メソッドで実現できます。
z = torch.arange(12).reshape(6, 2)
print(f"Original z: \n {z}")

# 2D -> 1D
z = z.flatten()
print(f"Flattened z: \n {z}")

# and back to 2D
z = z.reshape(3, 4)
print(f"Reshaped (3x4) z: \n {z}").view()メソッドもよく使われますが、.view()と.reshape()には微妙な違いがあります。ここでは.reshape()を使います。詳細は付録のドキュメントを参照してください。
テンソルの圧縮(squeeze)
バッチ処理を行うと、しばしばサイズ1の次元(シングルトン次元)が残ります。例えば、[1,10]や[256, 1, 3]のような形状です。この次元があると行列演算で問題になることがあります。
シングルトン次元を圧縮するには.squeeze()メソッドを使います。逆に次元を増やすには.unsqueeze()メソッドを使います。
x = torch.randn(1, 10)
# printing the zeroth element of the tensor will not give us the first number!

print(x.shape)
print(f"x[0]: {x[0]}")その厄介なシングルトン次元のために、x[0]は最初の行を返しました!
# Let's get rid of that singleton dimension and see what happens now
x = x.squeeze(0)
print(x.shape)
print(f"x[0]: {x[0]}")
# Adding singleton dimensions works a similar way, and is often used when tensors
# being added need same number of dimensions
y = torch.randn(5, 5)
print(f"Shape of y: {y.shape}")
# lets insert a singleton dimension
y = y.unsqueeze(1)
print(f"Shape of y: {y.shape}")次元の入れ替え(Permutation)
時には次元の順序が間違っていることがあります。例えば、RGB画像の形状がで、パイプラインが色の次元を最後に期待している場合、に変換する必要があります。これには.permute()メソッドを使います。
# `x` has dimensions [color,image_height,image_width]
x = torch.rand(3, 48, 64)

# We want to permute our tensor to be [ image_height , image_width , color ]
x = x.permute(1, 2, 0)
# permute(1,2,0) means:
# The 0th dim of my new tensor = the 1st dim of my old tensor
# The 1st dim of my new tensor = the 2nd
# The 2nd dim of my new tensor = the 0th
print(x.shape).transpose()も使われることがあります。これは.permute()に似ていますが、一度に2つの次元だけを入れ替えます。
連結
この例では、2つの行列を行方向(軸0、形状の最初の要素)と列方向(軸1、形状の2番目の要素)に連結しています。最初の出力テンソルの軸0の長さ(6)は2つの入力テンソルの軸0の長さの和(3+3)であり、2番目の出力テンソルの軸1の長さ(8)は2つの入力テンソルの軸1の長さの和(4+4)です。
# Create two tensors of the same shape
x = torch.arange(12, dtype=torch.float32).reshape((3, 4))
y = torch.tensor([[2.0, 1, 4, 3], [1, 2, 3, 4], [4, 3, 2, 1]])

# Concatenate along rows
cat_rows = torch.cat((x, y), dim=0)

# Concatenate along columns
cat_cols = torch.cat((x, y), dim=1)

# Printing outputs
print('Concatenated by rows: shape{} \n {}'.format(list(cat_rows.shape), cat_rows))
print('\n Concatenated by colums: shape{}  \n {}'.format(list(cat_cols.shape), cat_cols))
他のPythonオブジェクトへの変換
テンソルをnumpy.ndarrayに変換したり、その逆を行うのは簡単で、変換後の結果はメモリを共有しません。この点は重要です。CPUやGPUで計算を行う際に、PythonのNumPyパッケージが同じメモリを使って何かをしようとして計算が止まるのを防ぎます。
NumPy配列に変換すると、テンソルが追跡している情報、つまり計算グラフは失われます。これは明日autogradを学ぶ際に詳しく扱います。
x = torch.randn(5)
print(f"x: {x}  |  x type:  {x.type()}")

y = x.numpy()
print(f"y: {y}  |  y type:  {type(y)}")

z = torch.tensor(y)
print(f"z: {z} | z type: {z.type()}")サイズ1のテンソルをPythonのスカラーに変換するには、item関数やPythonの組み込み関数を使います。
a = torch.tensor([3.5])
a, a.item(), float(a), int(a)
コーディング演習 2.3: テンソル操作
上記で説明したメソッドを組み合わせて、以下の関数を完成させてください。
関数A
この関数は2つの2次元テンソルとを受け取り、の列ごとの和にの全要素の和を掛けたもの(スカラー)を返します。例えば、
関数B
この関数は正方行列を受け取り、をフラット化したものに各要素のインデックスを行方向に付加した2次元テンソルを返します。例えば、
ヒント: シングルトン次元に注意してください。
関数C
この関数は2つの2次元テンソルとを受け取ります。もし形状が合えば、の形状に合わせたとの要素ごとの和を返し、そうでなければ2つのテンソルを連結した1次元テンソルを返します。例えば、
ヒント: torch.numel()はテンソルの要素数を簡単に取得できます。
def functionA(my_tensor1, my_tensor2):
  """
  This function takes in two 2D tensors `my_tensor1` and `my_tensor2`
  and returns the column sum of
  `my_tensor1` multiplied by the sum of all the elmements of `my_tensor2`,
  i.e., a scalar.

  Args:
    my_tensor1: torch.Tensor
    my_tensor2: torch.Tensor

  Retuns:
    output: torch.Tensor
      The multiplication of the column sum of `my_tensor1` by the sum of
      `my_tensor2`.
  """
  ################################################
  ## TODO for students: complete functionA
  raise NotImplementedError("Student exercise: complete function A")
  ################################################
  # TODO multiplication the sum of the tensors
  output = ...

  return output


def functionB(my_tensor):
  """
  This function takes in a square matrix `my_tensor` and returns a 2D tensor
  consisting of a flattened `my_tensor` with the index of each element
  appended to this tensor in the row dimension.

  Args:
    my_tensor: torch.Tensor

  Returns:
    output: torch.Tensor
      Concatenated tensor.
  """
  ################################################
  ## TODO for students: complete functionB
  raise NotImplementedError("Student exercise: complete function B")
  ################################################
  # TODO flatten the tensor `my_tensor`
  my_tensor = ...
  # TODO create the idx tensor to be concatenated to `my_tensor`
  idx_tensor = ...
  # TODO concatenate the two tensors
  output = ...

  return output


def functionC(my_tensor1, my_tensor2):
  """
  This function takes in two 2D tensors `my_tensor1` and `my_tensor2`.
  If the dimensions allow it, it returns the
  elementwise sum of `my_tensor1`-shaped `my_tensor2`, and `my_tensor2`;
  else this function returns a 1D tensor that is the concatenation of the
  two tensors.

  Args:
    my_tensor1: torch.Tensor
    my_tensor2: torch.Tensor

  Returns:
    output: torch.Tensor
      Concatenated tensor.
  """
  ################################################
  ## TODO for students: complete functionB
  raise NotImplementedError("Student exercise: complete function C")
  ################################################
  # TODO check we can reshape `my_tensor2` into the shape of `my_tensor1`
  if ...:
    # TODO reshape `my_tensor2` into the shape of `my_tensor1`
    my_tensor2 = ...
    # TODO sum the two tensors
    output = ...
  else:
    # TODO flatten both tensors
    my_tensor1 = ...
    my_tensor2 = ...
    # TODO concatenate the two tensors in the correct dimension
    output = ...

  return output


## Implement the functions above and then uncomment the following lines to test your code
# print(functionA(torch.tensor([[1, 1], [1, 1]]), torch.tensor([[1, 2, 3], [1, 2, 3]])))
# print(functionB(torch.tensor([[2, 3], [-1, 10]])))
# print(functionC(torch.tensor([[1, -1], [-1, 3]]), torch.tensor([[2, 3, 0, 2]])))
# print(functionC(torch.tensor([[1, -1], [-1, 3]]), torch.tensor([[2, 3, 0]])))tensor([24, 24])
tensor([[ 0, 2],
[ 1, 3],
[ 2, -1],
[ 3, 10]])
tensor([[ 3, 2],
[-1, 5]])
tensor([ 1, -1, -1, 3, 2, 3, 0])
# @title Submit your feedback
content_review(f"{feedback_prefix}_Manipulating_Tensors_Exercise")
セクション 2.4: GPU
# @title Video 6: GPU vs CPU
from ipywidgets import widgets
from IPython.display import YouTubeVideo
from IPython.display import IFrame
from IPython.display import display


class PlayVideo(IFrame):
  def __init__(self, id, source, page=1, width=400, height=300, **kwargs):
    self.id = id
    if source == 'Bilibili':
      src = f'https://player.bilibili.com/player.html?bvid={id}&page={page}'
    elif source == 'Osf':
      src = f'https://mfr.ca-1.osf.io/render?url=https://osf.io/download/{id}/?direct%26mode=render'
    super(PlayVideo, self).__init__(src, width, height, **kwargs)


def display_videos(video_ids, W=400, H=300, fs=1):
  tab_contents = []
  for i, video_id in enumerate(video_ids):
    out = widgets.Output()
    with out:
      if video_ids[i][0] == 'Youtube':
        video = YouTubeVideo(id=video_ids[i][1], width=W,
                             height=H, fs=fs, rel=0)
        print(f'Video available at https://youtube.com/watch?v={video.id}')
      else:
        video = PlayVideo(id=video_ids[i][1], source=video_ids[i][0], width=W,
                          height=H, fs=fs, autoplay=False)
        if video_ids[i][0] == 'Bilibili':
          print(f'Video available at https://www.bilibili.com/video/{video.id}')
        elif video_ids[i][0] == 'Osf':
          print(f'Video available at https://osf.io/{video.id}')
      display(video)
    tab_contents.append(out)
  return tab_contents


video_ids = [('Youtube', '9Mc9GFUtILY'), ('Bilibili', 'BV1nM4y1K7qx')]
tab_contents = display_videos(video_ids, W=854, H=480)
tabs = widgets.Tab()
tabs.children = tab_contents
for i in range(len(tab_contents)):
  tabs.set_title(i, video_ids[i][0])
display(tabs)
# @title Submit your feedback
content_review(f"{feedback_prefix}_GPU_vs_CPU_Video")デフォルトでは、テンソルを作成するとGPU上には配置されません!
x = torch.randn(10)
print(x.device)
Colabノートブックを使う場合、デフォルトではGPUにアクセスできません。GPUを使い始めるには、まずGPUをリクエストする必要があります。画面上部のランタイムタブから行います。
ランタイム → ランタイムのタイプを変更 を選択し、ハードウェアアクセラレータのドロップダウンリストからGPUを選択すると、GPUを使い始められます。
これを行うとランタイムが再起動し、PyTorchを再インポートするために最初のセットアップセルを再実行する必要があります。その後、次のセルに進んでください。
GPU使用ポリシーの詳細は付録をご覧ください。
今、GPUを手に入れました。
以下のセルは True を返すはずです。
print(torch.cuda.is_available())CUDA は、NvidiaがGPUと連携するために開発したAPIです。PyTorchは抽象化レイヤーを提供し、純粋なPythonでCUDAカーネルを起動できるようにしています。
簡単に言うと、GPU上でテンソル計算を並列化する力を得つつ、(比較的)シンプルなPythonコードだけで書けるのです!
ここでは、ノートブックで使用するデバイス(cpu または cuda)を返す関数 set_device を定義します。特に指定がない限り、すべてのチュートリアルの冒頭でこの関数を使い、以下のようにデバイス変数を保存します。
DEVICE = set_device()
PyTorchのパッケージ torch.cuda を使って関数を定義しましょう。torch.cuda は遅延初期化されているため、常にインポートでき、 でシステムがCUDAをサポートしているか判定できます。
def set_device():
  """
  Set the device. CUDA if available, CPU otherwise

  Args:
    None

  Returns:
    Nothing
  """
  device = "cuda" if torch.cuda.is_available() else "cpu"
  if device != "cuda":
    print("GPU is not enabled in this notebook. \n"
          "If you want to enable it, in the menu under `Runtime` -> \n"
          "`Hardware accelerator.` and select `GPU` from the dropdown menu")
  else:
    print("GPU is enabled in this notebook. \n"
          "If you want to disable it, in the menu under `Runtime` -> \n"
          "`Hardware accelerator.` and select `None` from the dropdown menu")

  return device
CUDAテンソルを作ってみましょう!
# common device agnostic way of writing code that can run on cpu OR gpu
# that we provide for you in each of the tutorials
DEVICE = set_device()

# we can specify a device when we first create our tensor
x = torch.randn(2, 2, device=DEVICE)
print(x.dtype)
print(x.device)

# we can also use the .to() method to change the device a tensor lives on
y = torch.randn(2, 2)
print(f"y before calling to() | device: {y.device} | dtype: {y.type()}")

y = y.to(DEVICE)
print(f"y after calling to() | device: {y.device} | dtype: {y.type()}")
CPUテンソルとCUDAテンソル間の演算
.to() を呼んだ後、テンソルの型が変わったことに注意してください。異なるデバイス上のテンソル同士で演算を試みるとどうなるでしょうか?
x = torch.tensor([0, 1, 2], device=DEVICE)
y = torch.tensor([3, 4, 5], device="cpu")

## Uncomment the following line and run this cell
# z = x + y
CUDAテンソルとCPUテンソルをこのように組み合わせることはできません。異なるデバイス上のテンソルを組み合わせて演算したい場合は、まずどちらかのデバイスに移動させる必要があります!以前と同様に .to() メソッドや .cpu()、.cuda() メソッドを使えます。ただし、CUDAが有効でないマシンで .cuda() を使うとエラーになります。
一般的に、このコースではすべてのディープラーニングはGPU上で行い、計算はCPU上で行うため、データを行き来させる必要があり、そのためにこれらのメソッドを呼び出すことがあります。
x = torch.tensor([0, 1, 2], device=DEVICE)
y = torch.tensor([3, 4, 5], device="cpu")
z = torch.tensor([6, 7, 8], device=DEVICE)

# moving to cpu
x = x.to("cpu")  # alternatively, you can use x = x.cpu()
print(x + y)

# moving to gpu
y = y.to(DEVICE)  # alternatively, you can use y = y.cuda()
print(y + z)
コーディング演習 2.4: GPUはどれくらい速い?
以下は簡単な関数 simpleFun です。この関数を完成させて、以下の演算を行うようにしてください:
-
要素ごとの乗算
-
行列乗算
これらの演算は、パラメータ device で指定されたCPUまたはGPUのいずれかで実行できるようにします。ヘルパー関数 timeFun(f, dim, iterations, device) を使います。
dim = 10000
iterations = 1
def simpleFun(dim, device):
"""
Helper function to check device-compatiblity with computations
Args:
dim: Integer
device: String
"cpu" or "cuda"
Returns:
Nothing.
"""
###############################################
## TODO for students: recreate the function, but
## ensure all computations happens on the `device`
raise NotImplementedError("Student exercise: fill in the missing code to create the tensors")
###############################################
# 2D tensor filled with uniform random numbers in [0,1), dim x dim
x = ...
# 2D tensor filled with uniform random numbers in [0,1), dim x dim
y = ...
# 2D tensor filled with the scalar value 2, dim x dim
z = ...
# elementwise multiplication of x and y
a = ...
# matrix multiplication of x and z
b = ...
del x
del y
del z
del a
del b
## Implement the function above and uncomment the following lines to test your code
# timeFun(f=simpleFun, dim=dim, iterations=iterations)
# timeFun(f=simpleFun, dim=dim, iterations=iterations, device=DEVICE)サンプル出力(ハードウェアに依存します)
1回の simpleFun(10000, cpu) の実行時間: 23.74070
1回の simpleFun(10000, cuda) の実行時間: 0.87535
# @title Submit your feedback
content_review(f"{feedback_prefix}_How_Much_Faster_Are_GPUs_Exercise")
考察!
テンソルの次元を小さくし、反復回数を増やしてみてください。CPUのみの関数の方がGPUより速くなるポイントが見つかるかもしれません。なぜでしょう?
# @title Submit your feedback
content_review(f"{feedback_prefix}_GPUs_Discussion")
セクション 2.5: データセットとデータローダー
# @title Video 7: Getting Data
from ipywidgets import widgets
from IPython.display import YouTubeVideo
from IPython.display import IFrame
from IPython.display import display


class PlayVideo(IFrame):
  def __init__(self, id, source, page=1, width=400, height=300, **kwargs):
    self.id = id
    if source == 'Bilibili':
      src = f'https://player.bilibili.com/player.html?bvid={id}&page={page}'
    elif source == 'Osf':
      src = f'https://mfr.ca-1.osf.io/render?url=https://osf.io/download/{id}/?direct%26mode=render'
    super(PlayVideo, self).__init__(src, width, height, **kwargs)


def display_videos(video_ids, W=400, H=300, fs=1):
  tab_contents = []
  for i, video_id in enumerate(video_ids):
    out = widgets.Output()
    with out:
      if video_ids[i][0] == 'Youtube':
        video = YouTubeVideo(id=video_ids[i][1], width=W,
                             height=H, fs=fs, rel=0)
        print(f'Video available at https://youtube.com/watch?v={video.id}')
      else:
        video = PlayVideo(id=video_ids[i][1], source=video_ids[i][0], width=W,
                          height=H, fs=fs, autoplay=False)
        if video_ids[i][0] == 'Bilibili':
          print(f'Video available at https://www.bilibili.com/video/{video.id}')
        elif video_ids[i][0] == 'Osf':
          print(f'Video available at https://osf.io/{video.id}')
      display(video)
    tab_contents.append(out)
  return tab_contents


video_ids = [('Youtube', 'LSkjPM1gFu0'), ('Bilibili', 'BV1744y127SQ')]
tab_contents = display_videos(video_ids, W=854, H=480)
tabs = widgets.Tab()
tabs.children = tab_contents
for i in range(len(tab_contents)):
  tabs.set_title(i, video_ids[i][0])
display(tabs)
# @title Submit your feedback
content_review(f"{feedback_prefix}_Getting_Data_Video")ニューラルネットワークモデルの訓練では大量のデータを扱います。幸いなことに、PyTorchはデータサンプルの整理や操作に役立つ優れたツールを提供しています。
# Import dataset and dataloaders related packages
from torchvision import datasets
from torchvision.transforms import ToTensor
from torch.utils.data import DataLoader
from torchvision.transforms import Compose, Grayscale
データセット
torchvision パッケージは、多くの公開データセットに簡単にアクセスできます。ここでは、CIFAR10 データセットを読み込みます。これは、車両や動物など10種類のクラスのカラー画像を含みます。
datasets.CIFAR10 型のオブジェクトを作成すると、データセットの全画像が自動的にダウンロードされ読み込まれます。結果のデータ構造は、データサンプルと対応するラベルを含むリストのように扱えます。
# Download and load the images from the CIFAR10 dataset
cifar10_data = datasets.CIFAR10(
    root="data",  # path where the images will be stored
    download=True,  # all images should be downloaded
    transform=ToTensor()  # transform the images to tensors
    )

# Print the number of samples in the loaded dataset
print(f"Number of samples: {len(cifar10_data)}")
print(f"Class names: {cifar10_data.classes}")
5万件のサンプルが読み込まれました。では、そのうちの1つを詳しく見てみましょう。各サンプルは画像と対応するラベルから成ります。
# Choose a random sample
random.seed(2021)
image, label = cifar10_data[random.randint(0, len(cifar10_data))]
print(f"Label: {cifar10_data.classes[label]}")
print(f"Image size: {image.shape}")カラー画像は3次元テンソルとしてモデル化されます。最初の次元は画像のチャネル数(この場合はRGBの3チャネル)を表します。2番目の次元は画像の高さ()、3番目は幅()です。この画像フォーマットは と表記できます。
コーディング演習 2.5: データセットから画像を表示しよう
matplotlib を使って画像を表示してみましょう。以下のコードは動作しません。なぜなら imshow は画像を異なるフォーマット、すなわち ではなく期待しているからです。
テンソルの次元を permute メソッドで並べ替える必要があります。PyTorchの torch.permute(*dims) は元のテンソルを指定した順序に並べ替え、新しい多次元テンソルを返します。返されるテンソルのサイズは元のものと同じです。
コードヒント:
サイズ2 x 4のテンソルを作成
input_var = torch.randn(2, 4)
サイズとテンソルを表示
print(input_var.size())
print(input_var)
次元を入れ替え
input_var = input_var.permute(1, 0)
サイズと入れ替え後のテンソルを表示
print(input_var.size())
print(input_var)
# TODO: Uncomment the following line to see the error that arises from the current image format
# plt.imshow(image)

# TODO: Comment the above line and fix this code by reordering the tensor dimensions
# plt.imshow(image.permute(...))
# plt.show()出力例:

# @title Submit your feedback
content_review(f"{feedback_prefix}_Display_an_Image_Exercise")
#@title Video 8: Train and Test
from ipywidgets import widgets
from IPython.display import YouTubeVideo
from IPython.display import IFrame
from IPython.display import display
class PlayVideo(IFrame):
def __init__(self, id, source, page=1, width=400, height=300, **kwargs):
self.id = id
if source == 'Bilibili':
src = f'https://player.bilibili.com/player.html?bvid={id}&page={page}'
elif source == 'Osf':
src = f'https://mfr.ca-1.osf.io/render?url=https://osf.io/download/{id}/?direct%26mode=render'
super(PlayVideo, self).__init__(src, width, height, **kwargs)
def display_videos(video_ids, W=400, H=300, fs=1):
tab_contents = []
for i, video_id in enumerate(video_ids):
out = widgets.Output()
with out:
if video_ids[i][0] == 'Youtube':
video = YouTubeVideo(id=video_ids[i][1], width=W,
height=H, fs=fs, rel=0)
print(f'Video available at https://youtube.com/watch?v={video.id}')
else:
video = PlayVideo(id=video_ids[i][1], source=video_ids[i][0], width=W,
height=H, fs=fs, autoplay=False)
if video_ids[i][0] == 'Bilibili':
print(f'Video available at https://www.bilibili.com/video/{video.id}')
elif video_ids[i][0] == 'Osf':
print(f'Video available at https://osf.io/{video.id}')
display(video)
tab_contents.append(out)
return tab_contents
video_ids = [('Youtube', 'JokSIuPs-ys'), ('Bilibili', 'BV1rV411H7s5')]
tab_contents = display_videos(video_ids, W=854, H=480)
tabs = widgets.Tab()
tabs.children = tab_contents
for i in range(len(tab_contents)):
tabs.set_title(i, video_ids[i][0])
display(tabs)# @title Submit your feedback
content_review(f"{feedback_prefix}_Train_and_Test_Video")訓練用とテスト用データセット
データセットを読み込む際、train 引数で訓練用かテスト用かを指定できます。訓練用とテスト用のデータセットは別々に読み込めます。ここでは簡単のため両方を別々に使いませんが、このトピックは今後の日で扱います。
# Load the training samples
training_data = datasets.CIFAR10(
    root="data",
    train=True,
    download=True,
    transform=ToTensor()
    )

# Load the test samples
test_data = datasets.CIFAR10(
    root="data",
    train=False,
    download=True,
    transform=ToTensor()
    )
# @title Video 9: Data Augmentation - Transformations
from ipywidgets import widgets
from IPython.display import YouTubeVideo
from IPython.display import IFrame
from IPython.display import display
class PlayVideo(IFrame):
def __init__(self, id, source, page=1, width=400, height=300, **kwargs):
self.id = id
if source == 'Bilibili':
src = f'https://player.bilibili.com/player.html?bvid={id}&page={page}'
elif source == 'Osf':
src = f'https://mfr.ca-1.osf.io/render?url=https://osf.io/download/{id}/?direct%26mode=render'
super(PlayVideo, self).__init__(src, width, height, **kwargs)
def display_videos(video_ids, W=400, H=300, fs=1):
tab_contents = []
for i, video_id in enumerate(video_ids):
out = widgets.Output()
with out:
if video_ids[i][0] == 'Youtube':
video = YouTubeVideo(id=video_ids[i][1], width=W,
height=H, fs=fs, rel=0)
print(f'Video available at https://youtube.com/watch?v={video.id}')
else:
video = PlayVideo(id=video_ids[i][1], source=video_ids[i][0], width=W,
height=H, fs=fs, autoplay=False)
if video_ids[i][0] == 'Bilibili':
print(f'Video available at https://www.bilibili.com/video/{video.id}')
elif video_ids[i][0] == 'Osf':
print(f'Video available at https://osf.io/{video.id}')
display(video)
tab_contents.append(out)
return tab_contents
video_ids = [('Youtube', 'sjegA9OBUPw'), ('Bilibili', 'BV19B4y1N77t')]
tab_contents = display_videos(video_ids, W=854, H=480)
tabs = widgets.Tab()
tabs.children = tab_contents
for i in range(len(tab_contents)):
tabs.set_title(i, video_ids[i][0])
display(tabs)データローダー
もう一つ重要な概念は Dataloader です。これは Dataset をラップし、ミニバッチに分割(ニューラルネットワークの訓練で重要)し、データを反復可能にします。shuffle 引数はミニバッチ間でサンプルの順序をシャッフルするために使います。
# Create dataloaders with
train_dataloader = DataLoader(training_data, batch_size=64, shuffle=True)
test_dataloader = DataLoader(test_data, batch_size=64, shuffle=True)
再現性: DataLoaderはマルチプロセスでのデータ読み込み時の乱数シードを再設定します。再現性を保つには と generator を使います:
def seed_worker(worker_id):
  worker_seed = torch.initial_seed() % 2**32
  numpy.random.seed(worker_seed)
  random.seed(worker_seed)


g_seed = torch.Generator()
g_seed.manual_seed(my_seed)

DataLoader(
    train_dataset,
    batch_size=batch_size,
    num_workers=num_workers,
    worker_init_fn=seed_worker,
    generator=g_seed
    )
重要: seed_worker を効果的に使うには、num_workers は2以上にしてください。
データローダーから次のバッチを取得して中身を確認できます。これには、iter 関数でデータローダーオブジェクトをPythonのイテレータに変換し、next 関数で次のバッチを取得します。
4次元テンソルが得られます。これはバッチ内に64枚の画像があり()、各画像はチャネル数()、高さ()、幅()の3次元を持つためです。つまり、4次元テンソルのサイズは です。
# Load the next batch
batch_images, batch_labels = next(iter(train_dataloader))
print('Batch size:', batch_images.shape)

# Display the first image from the batch
plt.imshow(batch_images[0].permute(1, 2, 0))
plt.show()
変換(Transformations)
データセットを読み込む際に、色変換、正規化、切り抜き、回転などの変換を適用することも便利です。torchvision.transforms パッケージには多くの事前定義済み変換があり、Compose で組み合わせることもできます。詳細は pytorchのドキュメント を参照してください。
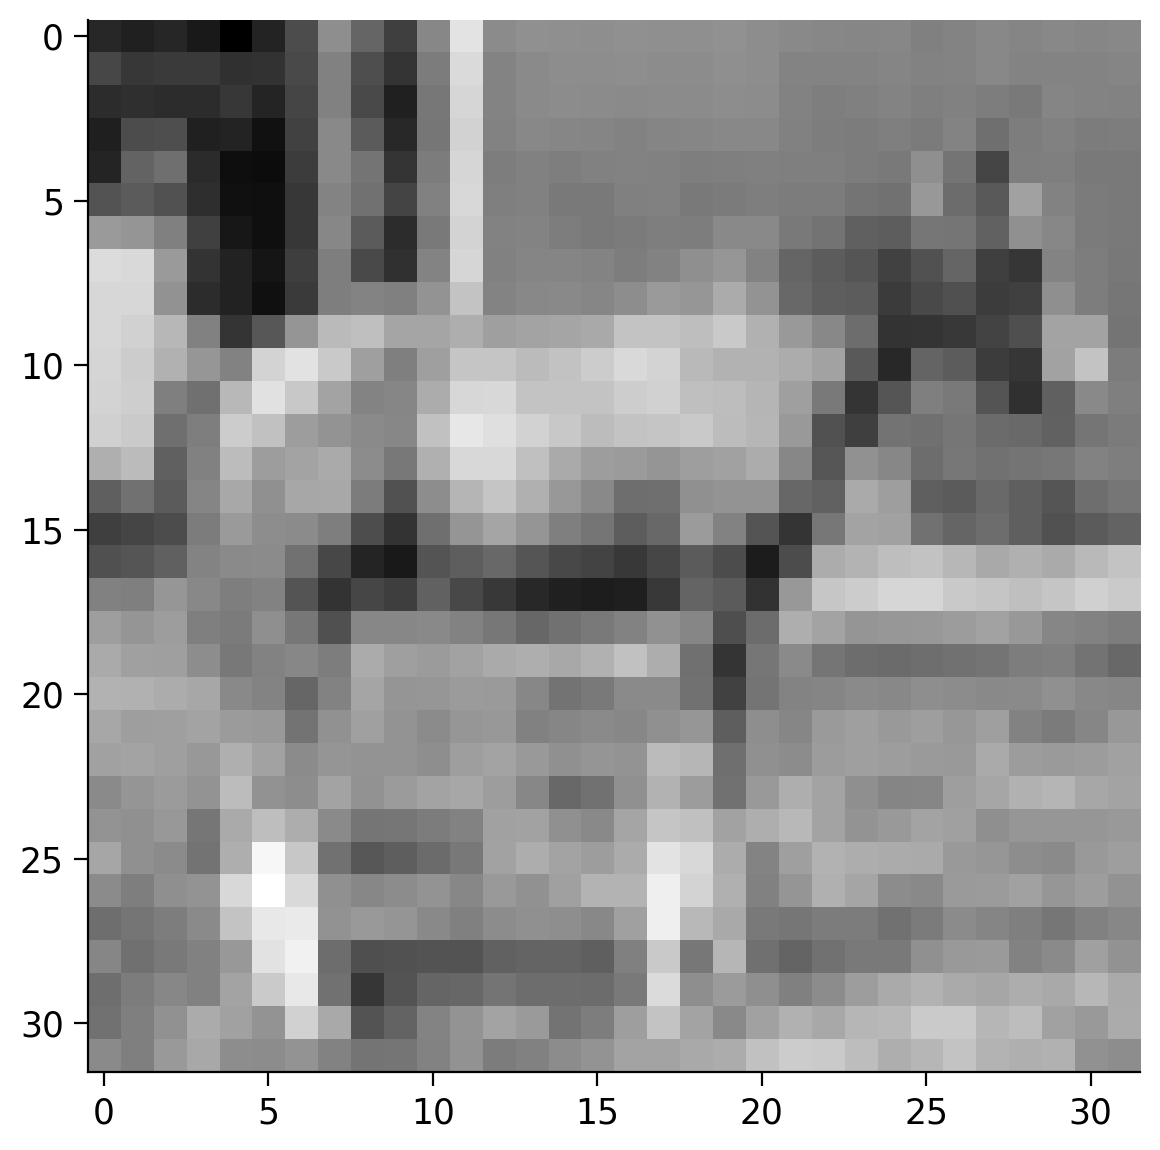
コーディング演習 2.6: CIFAR10データセットをグレースケール画像として読み込もう
この演習の目的は、CIFAR10の画像をグレースケール画像として読み込むことです。再現性を確保するために set_seed 関数を再実行している点に注意してください。
def my_data_load():
  """
  Function to load CIFAR10 data as grayscale images

  Args:
    None

  Returns:
    data: DataFrame
      CIFAR10 loaded Dataframe of shape (3309, 14)
  """
  ###############################################
  ## TODO for students: load the CIFAR10 data,
  ## but as grayscale images and not as RGB colored.
  raise NotImplementedError("Student exercise: fill in the missing code to load the data")
  ###############################################
  ## TODO Load the CIFAR10 data using a transform that converts the images to grayscale tensors
  data = datasets.CIFAR10(...,
                          transform=...)
  # Display a random grayscale image
  image, label = data[random.randint(0, len(data))]
  plt.imshow(image.squeeze(), cmap="gray")
  plt.show()

  return data


set_seed(seed=2021)
## After implementing the above code, uncomment the following lines to test your code
# data = my_data_load()出力例:
# @title Submit your feedback
content_review(f"{feedback_prefix}_Load_CIFAR10_Exercise")
セクション 3: ニューラルネットワーク
所要時間の目安: 約1時間30分(動画を除く)
さあ、PyTorchを使って最初のニューラルネットワークを作成しましょう。このセクションでは以下の流れを説明します:
- シンプルなニューラルネットワークモデルの作成
- ネットワークの訓練
- ネットワークの結果の可視化
- ネットワークの調整
# @title Video 10: CSV Files
from ipywidgets import widgets
from IPython.display import YouTubeVideo
from IPython.display import IFrame
from IPython.display import display


class PlayVideo(IFrame):
  def __init__(self, id, source, page=1, width=400, height=300, **kwargs):
    self.id = id
    if source == 'Bilibili':
      src = f'https://player.bilibili.com/player.html?bvid={id}&page={page}'
    elif source == 'Osf':
      src = f'https://mfr.ca-1.osf.io/render?url=https://osf.io/download/{id}/?direct%26mode=render'
    super(PlayVideo, self).__init__(src, width, height, **kwargs)


def display_videos(video_ids, W=400, H=300, fs=1):
  tab_contents = []
  for i, video_id in enumerate(video_ids):
    out = widgets.Output()
    with out:
      if video_ids[i][0] == 'Youtube':
        video = YouTubeVideo(id=video_ids[i][1], width=W,
                             height=H, fs=fs, rel=0)
        print(f'Video available at https://youtube.com/watch?v={video.id}')
      else:
        video = PlayVideo(id=video_ids[i][1], source=video_ids[i][0], width=W,
                          height=H, fs=fs, autoplay=False)
        if video_ids[i][0] == 'Bilibili':
          print(f'Video available at https://www.bilibili.com/video/{video.id}')
        elif video_ids[i][0] == 'Osf':
          print(f'Video available at https://osf.io/{video.id}')
      display(video)
    tab_contents.append(out)
  return tab_contents


video_ids = [('Youtube', 'JrC_UAJWYKU'), ('Bilibili', 'BV1xy4y1T7kv')]
tab_contents = display_videos(video_ids, W=854, H=480)
tabs = widgets.Tab()
tabs.children = tab_contents
for i in range(len(tab_contents)):
  tabs.set_title(i, video_ids[i][0])
display(tabs)
# @title Submit your feedback
content_review(f"{feedback_prefix}_CSV_files_Video")セクション 3.1: データの読み込み
まずはネットワークの訓練に使うサンプルデータが必要です。以下の関数を使うと、2つの絡み合う半円状の2次元点からなる例のデータセットを生成できます。データは sample_data.csv というファイルに保存されます。Colabの左側のファイル欄からCSVファイルを直接確認できます。
# @title Generate sample data
# @markdown we used `scikit-learn` module
from sklearn.datasets import make_moons

# Create a dataset of 256 points with a little noise
X, y = make_moons(256, noise=0.1)

# Store the data as a Pandas data frame and save it to a CSV file
df = pd.DataFrame(dict(x0=X[:,0], x1=X[:,1], y=y))
df.to_csv('sample_data.csv')
次に、Pandasライブラリを使ってCSVファイルからデータを読み込みます。Pandasは様々な形式のファイル読み込みに便利な関数を提供し、CSVファイルから読み込む際は列名で直接参照できます。
# Load the data from the CSV file in a Pandas DataFrame
data = pd.read_csv("sample_data.csv")

# Create a 2D numpy array from the x0 and x1 columns
X_orig = data[["x0", "x1"]].to_numpy()

# Create a 1D numpy array from the y column
y_orig = data["y"].to_numpy()

# Print the sizes of the generated 2D points X and the corresponding labels Y
print(f"Size X:{X_orig.shape}")
print(f"Size y:{y_orig.shape}")

# Visualize the dataset. The color of the points is determined by the labels `y_orig`.
plt.scatter(X_orig[:, 0], X_orig[:, 1], s=40, c=y_orig)
plt.show()
PyTorch用にデータを準備する
次に、PyTorchで扱いやすい形式にデータを変換します。すべてテンソルに変換しましょう。
# Initialize the device variable
DEVICE = set_device()

# Convert the 2D points to a float32 tensor
X = torch.tensor(X_orig, dtype=torch.float32)

# Upload the tensor to the device
X = X.to(DEVICE)

print(f"Size X:{X.shape}")

# Convert the labels to a long interger tensor
y = torch.from_numpy(y_orig).type(torch.LongTensor)

# Upload the tensor to the device
y = y.to(DEVICE)

print(f"Size y:{y.shape}")
セクション 3.2: シンプルなニューラルネットワークを作成しよう
# @title Video 11: Generating the Neural Network
from ipywidgets import widgets
from IPython.display import YouTubeVideo
from IPython.display import IFrame
from IPython.display import display


class PlayVideo(IFrame):
  def __init__(self, id, source, page=1, width=400, height=300, **kwargs):
    self.id = id
    if source == 'Bilibili':
      src = f'https://player.bilibili.com/player.html?bvid={id}&page={page}'
    elif source == 'Osf':
      src = f'https://mfr.ca-1.osf.io/render?url=https://osf.io/download/{id}/?direct%26mode=render'
    super(PlayVideo, self).__init__(src, width, height, **kwargs)


def display_videos(video_ids, W=400, H=300, fs=1):
  tab_contents = []
  for i, video_id in enumerate(video_ids):
    out = widgets.Output()
    with out:
      if video_ids[i][0] == 'Youtube':
        video = YouTubeVideo(id=video_ids[i][1], width=W,
                             height=H, fs=fs, rel=0)
        print(f'Video available at https://youtube.com/watch?v={video.id}')
      else:
        video = PlayVideo(id=video_ids[i][1], source=video_ids[i][0], width=W,
                          height=H, fs=fs, autoplay=False)
        if video_ids[i][0] == 'Bilibili':
          print(f'Video available at https://www.bilibili.com/video/{video.id}')
        elif video_ids[i][0] == 'Osf':
          print(f'Video available at https://osf.io/{video.id}')
      display(video)
    tab_contents.append(out)
  return tab_contents


video_ids = [('Youtube', 'PwSzRohUvck'), ('Bilibili', 'BV1fK4y1M74a')]
tab_contents = display_videos(video_ids, W=854, H=480)
tabs = widgets.Tab()
tabs.children = tab_contents
for i in range(len(tab_contents)):
  tabs.set_title(i, video_ids[i][0])
display(tabs)
# @title Submit your feedback
content_review(f"{feedback_prefix}_Generating_Neural_Network_Video")この例では、以下の3層からなるシンプルなニューラルネットワークを作成します:
- 入力層(サイズ2、点は2次元座標)
- 隠れ層(サイズ16、ここは自由に変更可能)
- 出力層(サイズ2、2クラスのスコアを出力)
コース中は様々な種類のニューラルネットワークを扱います。2日目は線形ネットワークに焦点を当てますが、今後はより複雑なアーキテクチャも扱います。ここでの例は、ニューラルネットワークの作成から訓練までの一連の流れを示すことが目的です。
ネットワークのプログラミング
PyTorchはすべてのニューラルネットワークモジュールの基底クラスとして nn.Module を提供しています。nn.Module を継承し、重要なメソッドを実装する必要があります:
-
__init____init__メソッドではネットワークの構造を定義します。どの層を使うか、どんな活性化関数を使うかなどを指定します。 -
forwardすべてのニューラルネットワークモジュールは
forwardメソッドを実装しなければなりません。これはデータがネットワークに通されたときに行う計算を指定します。 -
predictこれは必須ではありませんが、ネットワークから最も可能性の高いラベルを素早く得るための良い習慣です。
forwardを呼び出し、最もスコアの高いラベルを選びます。 -
trainこれも必須ではありませんが、パラメータを訓練するために使う良い習慣です。ここでは後ほどノートブック内で実装します。
注意: モジュールの __call__ メソッドを直接使うと forward が呼ばれます。つまり net() は net.forward() と同じです。
# Inherit from nn.Module - the base class for neural network modules provided by Pytorch
class NaiveNet(nn.Module):
  """
  NaiveNet architecture
  Structure is as follows:
  Linear Layer (2, 16) -> ReLU activation -> Linear Layer (16, 2)
  """
  # Define the structure of your network
  def __init__(self):
    """
    Defines the NaiveNet structure by initialising following attributes
    nn.Linear (2, 16):  Transformation from the input to the hidden layer
    nn.ReLU: Activation function (ReLU) is a non-linearity which is widely used because it reduces computation.
             The function returns 0 if it receives any negative input, but for any positive value x, it returns that value back.
    nn.Linear (16, 2): Transformation from the hidden to the output layer

    Args:
      None

    Returns:
      Nothing
    """
    super(NaiveNet, self).__init__()

    # The network is defined as a sequence of operations
    self.layers = nn.Sequential(
        nn.Linear(2, 16),
        nn.ReLU(),
        nn.Linear(16, 2),
    )

  # Specify the computations performed on the data
  def forward(self, x):
    """
    Defines the forward pass through the above defined structure

    Args:
      x: torch.Tensor
        Input tensor of size ([3])

    Returns:
      layers: nn.module
        Initialised Layers in order to re-use the same layer for each forward pass of data you make.
    """
    # Pass the data through the layers
    return self.layers(x)

  # Choose the most likely label predicted by the network
  def predict(self, x):
    """
    Performs the prediction task of the network

    Args:
      x: torch.Tensor
        Input tensor of size ([3])

    Returns:
      Most likely class i.e., Label with the highest score
    """
    # Pass the data through the networks
    output = self.forward(x)

    # Choose the label with the highest score
    return torch.argmax(output, 1)

  # Train the neural network (will be implemented later)
  def train(self, X, y):
    """
    Training the Neural Network

    Args:
      X: torch.Tensor
        Input data
      y: torch.Tensor
        Class Labels/Targets

    Returns:
      Nothing
    """
    pass
ネットワークが動作するか確認しよう
モデルのインスタンスを作成し、可視化してみましょう。
# Create new NaiveNet and transfer it to the device
model = NaiveNet().to(DEVICE)

# Print the structure of the network
print(model)
コーディング演習 3.2: サンプルを分類しよう
データセットのいくつかの点をネットワークに通してみて、動作を確認しましょう。まだ訓練していないので正しく分類できるとは限りません。
ここでの目的は、forward と predict メソッドに渡されるデータ構造や結果に慣れることです。
## Get the samples
# X_samples = ...
# print("Sample input:\n", X_samples)

## Do a forward pass of the network
# output = ...
# print("\nNetwork output:\n", output)

## Predict the label of each point
# y_predicted = ...
# print("\nPredicted labels:\n", y_predicted)入力例:
tensor([[ 0.9066, 0.5052],
[-0.2024, 1.1226],
[ 1.0685, 0.2809],
[ 0.6720, 0.5097],
[ 0.8548, 0.5122]], device='cuda:0')
ネットワーク出力:
tensor([[ 0.1543, -0.8018],
[ 2.2077, -2.9859],
[-0.5745, -0.0195],
[ 0.1924, -0.8367],
[ 0.1818, -0.8301]], device='cuda:0', grad_fn=<AddmmBackward>)
予測ラベル:
tensor([0, 0, 1, 0, 0], device='cuda:0')
# @title Submit your feedback
content_review(f"{feedback_prefix}_Classify_some_examples_Exercise")
セクション 3.3: ニューラルネットワークを訓練しよう
# @title Video 12: Train the Network
from ipywidgets import widgets
from IPython.display import YouTubeVideo
from IPython.display import IFrame
from IPython.display import display


class PlayVideo(IFrame):
  def __init__(self, id, source, page=1, width=400, height=300, **kwargs):
    self.id = id
    if source == 'Bilibili':
      src = f'https://player.bilibili.com/player.html?bvid={id}&page={page}'
    elif source == 'Osf':
      src = f'https://mfr.ca-1.osf.io/render?url=https://osf.io/download/{id}/?direct%26mode=render'
    super(PlayVideo, self).__init__(src, width, height, **kwargs)


def display_videos(video_ids, W=400, H=300, fs=1):
  tab_contents = []
  for i, video_id in enumerate(video_ids):
    out = widgets.Output()
    with out:
      if video_ids[i][0] == 'Youtube':
        video = YouTubeVideo(id=video_ids[i][1], width=W,
                             height=H, fs=fs, rel=0)
        print(f'Video available at https://youtube.com/watch?v={video.id}')
      else:
        video = PlayVideo(id=video_ids[i][1], source=video_ids[i][0], width=W,
                          height=H, fs=fs, autoplay=False)
        if video_ids[i][0] == 'Bilibili':
          print(f'Video available at https://www.bilibili.com/video/{video.id}')
        elif video_ids[i][0] == 'Osf':
          print(f'Video available at https://osf.io/{video.id}')
      display(video)
    tab_contents.append(out)
  return tab_contents


video_ids = [('Youtube', '4MIqnE4XPaA'), ('Bilibili', 'BV1v54y1n7CS')]
tab_contents = display_videos(video_ids, W=854, H=480)
tabs = widgets.Tab()
tabs.children = tab_contents
for i in range(len(tab_contents)):
  tabs.set_title(i, video_ids[i][0])
display(tabs)
# @title Submit your feedback
content_review(f"{feedback_prefix}_Train_the_Network_Video")さて、ネットワークをデータセットで訓練する時間です。まだすべてを完全に理解できなくても心配いりません。訓練については今後の日で詳しく扱います。ここではネットワークを動かすことが目的です!
通常はクラス NaiveNet の中で train メソッドを実装しますが、ここでは別セルに分けて関数として実装します。
# @title Helper function to plot the decision boundary

# Code adapted from this notebook: https://jonchar.net/notebooks/Artificial-Neural-Network-with-Keras/

from pathlib import Path

def plot_decision_boundary(model, X, y, device):
  """
  Helper function to plot decision boundary

  Args:
    model: nn.module
      NaiveNet instance
    X: torch.tensor
      Input CIFAR10 data
    y: torch.tensor
      Class Labels/Targets
    device: String
      "cpu" or "cuda"

  Returns:
    Nothing
  """
  # Transfer the data to the CPU
  X = X.cpu().numpy()
  y = y.cpu().numpy()

  # Check if the frames folder exists and create it if needed
  frames_path = Path("frames")
  if not frames_path.exists():
    frames_path.mkdir()

  # Set min and max values and give it some padding
  x_min, x_max = X[:, 0].min() - .5, X[:, 0].max() + .5
  y_min, y_max = X[:, 1].min() - .5, X[:, 1].max() + .5
  h = 0.01

  # Generate a grid of points with distance h between them
  xx, yy = np.meshgrid(np.arange(x_min, x_max, h), np.arange(y_min, y_max, h))

  # Predict the function value for the whole gid
  grid_points = np.c_[xx.ravel(), yy.ravel()]
  grid_points = torch.from_numpy(grid_points).type(torch.FloatTensor)
  Z = model.predict(grid_points.to(device)).cpu().numpy()
  Z = Z.reshape(xx.shape)

  # Plot the contour and training examples
  plt.contourf(xx, yy, Z, cmap=plt.cm.Spectral)
  plt.scatter(X[:, 0], X[:, 1], c=y, cmap=plt.cm.binary)
# Implement the train function given a training dataset X and correcsponding labels y
def train(model, X, y):
"""
Training the Neural Network
Args:
X: torch.Tensor
Input data
y: torch.Tensor
Class Labels/Targets
Returns:
losses: Float
Cross Entropy Loss; Cross-entropy builds upon the idea of entropy
from information theory and calculates the number of bits required
to represent or transmit an average event from one distribution
compared to another distribution.
"""
# The Cross Entropy Loss is suitable for classification problems
loss_function = nn.CrossEntropyLoss()
# Create an optimizer (Stochastic Gradient Descent) that will be used to train the network
learning_rate = 1e-2
optimizer = torch.optim.SGD(model.parameters(), lr=learning_rate)
# Number of epochs
epochs = 15000
# List of losses for visualization
losses = []
for i in range(epochs):
# Pass the data through the network and compute the loss
# We'll use the whole dataset during the training instead of using batches
# in to order to keep the code simple for now.
y_logits = model.forward(X)
loss = loss_function(y_logits, y)
# Clear the previous gradients and compute the new ones
optimizer.zero_grad()
loss.backward()
# Adapt the weights of the network
optimizer.step()
# Store the loss
losses.append(loss.item())
# Print the results at every 1000th epoch
if i % 1000 == 0:
print(f"Epoch {i} loss is {loss.item()}")
plot_decision_boundary(model, X, y, DEVICE)
plt.savefig('frames/{:05d}.png'.format(i))
return losses
# Create a new network instance a train it
model = NaiveNet().to(DEVICE)
losses = train(model, X, y)訓練中の損失をプロットしよう
訓練中の損失をプロットして、どのように減少し収束するかを見ましょう。
plt.plot(np.linspace(1, len(losses), len(losses)), losses)
plt.xlabel("Epoch")
plt.ylabel("Loss")
# @title Visualize the training process
# @markdown Execute this cell!
import imageio.v2 as imageio
from IPython.core.interactiveshell import InteractiveShell
from IPython.display import Image, display
from pathlib import Path
InteractiveShell.ast_node_interactivity = "all"
# Make a list with all images
images = []
for i in range(10):
filename = Path("frames/0"+str(i)+"000.png")
images.append(imageio.imread(filename))
# Save the gif
imageio.mimsave('frames/movie.gif', images)
gifPath = Path("frames/movie.gif")
with open(gifPath,'rb') as f:
display(Image(data=f.read(), format='png'))# @title Video 13: Play with it
from ipywidgets import widgets
from IPython.display import YouTubeVideo
from IPython.display import IFrame
from IPython.display import display
class PlayVideo(IFrame):
def __init__(self, id, source, page=1, width=400, height=300, **kwargs):
self.id = id
if source == 'Bilibili':
src = f'https://player.bilibili.com/player.html?bvid={id}&page={page}'
elif source == 'Osf':
src = f'https://mfr.ca-1.osf.io/render?url=https://osf.io/download/{id}/?direct%26mode=render'
super(PlayVideo, self).__init__(src, width, height, **kwargs)
def display_videos(video_ids, W=400, H=300, fs=1):
tab_contents = []
for i, video_id in enumerate(video_ids):
out = widgets.Output()
with out:
if video_ids[i][0] == 'Youtube':
video = YouTubeVideo(id=video_ids[i][1], width=W,
height=H, fs=fs, rel=0)
print(f'Video available at https://youtube.com/watch?v={video.id}')
else:
video = PlayVideo(id=video_ids[i][1], source=video_ids[i][0], width=W,
height=H, fs=fs, autoplay=False)
if video_ids[i][0] == 'Bilibili':
print(f'Video available at https://www.bilibili.com/video/{video.id}')
elif video_ids[i][0] == 'Osf':
print(f'Video available at https://osf.io/{video.id}')
display(video)
tab_contents.append(out)
return tab_contents
video_ids = [('Youtube', '_GGkapdOdSY'), ('Bilibili', 'BV1Cq4y1W7BH')]
tab_contents = display_videos(video_ids, W=854, H=480)
tabs = widgets.Tab()
tabs.children = tab_contents
for i in range(len(tab_contents)):
tabs.set_title(i, video_ids[i][0])
display(tabs)# @title Submit your feedback
content_review(f"{feedback_prefix}_Play_with_it_Video")演習 3.3: ネットワークを調整しよう
ネットワークのパラメータをいじって、どんな影響があるか体験してみましょう。試せるアイデアは:
- エポック数を増減する
- 隠れ層のサイズを増減する
- もう一つ隠れ層を追加する
ネットワークをよりデータにフィットさせられますか?
# @title Submit your feedback
content_review(f"{feedback_prefix}_Tweak_your_Network_Discussion")
# @title Video 14: XOR Widget
from ipywidgets import widgets
from IPython.display import YouTubeVideo
from IPython.display import IFrame
from IPython.display import display
class PlayVideo(IFrame):
def __init__(self, id, source, page=1, width=400, height=300, **kwargs):
self.id = id
if source == 'Bilibili':
src = f'https://player.bilibili.com/player.html?bvid={id}&page={page}'
elif source == 'Osf':
src = f'https://mfr.ca-1.osf.io/render?url=https://osf.io/download/{id}/?direct%26mode=render'
super(PlayVideo, self).__init__(src, width, height, **kwargs)
def display_videos(video_ids, W=400, H=300, fs=1):
tab_contents = []
for i, video_id in enumerate(video_ids):
out = widgets.Output()
with out:
if video_ids[i][0] == 'Youtube':
video = YouTubeVideo(id=video_ids[i][1], width=W,
height=H, fs=fs, rel=0)
print(f'Video available at https://youtube.com/watch?v={video.id}')
else:
video = PlayVideo(id=video_ids[i][1], source=video_ids[i][0], width=W,
height=H, fs=fs, autoplay=False)
if video_ids[i][0] == 'Bilibili':
print(f'Video available at https://www.bilibili.com/video/{video.id}')
elif video_ids[i][0] == 'Osf':
print(f'Video available at https://osf.io/{video.id}')
display(video)
tab_contents.append(out)
return tab_contents
video_ids = [('Youtube', 'oTr1nE2rCWg'), ('Bilibili', 'BV1mB4y1N7QS')]
tab_contents = display_videos(video_ids, W=854, H=480)
tabs = widgets.Tab()
tabs.children = tab_contents
for i in range(len(tab_contents)):
tabs.set_title(i, video_ids[i][0])
display(tabs)# @title Submit your feedback
content_review(f"{feedback_prefix}_XOR_widget_Video")排他的論理和(XOR)演算は、入力の真の数が奇数のときに真(1)を返します。つまり、入力のうち一方だけが真のときに真を返し、両方が偽(0)または両方が真のときは偽を返します。数学的には、XORは不等価関数を表し、入力が異なれば出力は真、同じなら偽です。
2つの入力 ( と ) の場合、以下の真理値表が適用されます:
\begin{matrix}
X & Y & \
\hline
0 & 0 & 0\
0 & 1 & 1\
1 & 0 & 1\
1 & 1 & 0
\end{matrix}
ここで 0 はブール値の False、1 は True を表します。
インタラクティブデモ 3.3: XORを解く
ここではTensorflowチームが開発した有名なオープンソースの可視化ウィジェットを使います。リンクは こちら です。
- ウィジェットを操作して、連続的なXORデータセットを解けるか試してみてください。
- 次に、隠れ層を3ユニットの1層追加し、ウィジェットで遊びながら手動で重みを設定してこのデータセットを完全に解いてみてください。
2つ目の部分では、接続をクリックして値を入力するか、上下キーで1ずつ増減できます。バイアスは各ニューロンの左下の小さな四角をクリックして同様に操作できます。
無限に多くの解がありますが、ReLU活性化関数の場合のきれいな解は:
十分に遊んだら、この関数を実装するように重みとバイアスを設定してみましょう :)
# @markdown Play with the parameters to solve XOR
from IPython.display import IFrame
from ipywidgets import widgets
url = 'https://playground.arashash.com/#activation=relu&batchSize=10&dataset=xor®Dataset=reg-plane&learningRate=0.03®ularizationRate=0&noise=0&networkShape=&seed=0.91390&showTestData=false&discretize=false&percTrainData=90&x=true&y=true&xTimesY=false&xSquared=false&ySquared=false&cosX=false&sinX=false&cosY=false&sinY=false&collectStats=false&problem=classification&initZero=false&hideText=false'
url2 = "https://playground.arashash.com"
out = widgets.Output()
with out:
print(f"If you want to vist the webpage: {url2}")
display(IFrame(src=f"{url}", width=1020, height=660))
display(out)# @markdown Do you think we can solve the discrete XOR (only 4 possibilities) with only 2 hidden units?
w1_min_xor = 'Select' # @param ['Select', 'Yes', 'No']
if w1_min_xor == 'Yes':
print("Awesome. Indeed, yes. We take the two points for which the output should be 1 and dedicate one of the hidden units to each of them. Each of theses ReLU functions are diagonal and tuned so that only for one of those two points the output is 1. In the end, we add these two together. And voila - discrete xor.")
elif w1_min_xor == 'No':
print("How about giving it another try?")
else:
print("Select 'Yes' or 'No'!")# @title Submit your feedback
content_review(f"{feedback_prefix}_XOR_Interactive_Demo")セクション 4: 倫理とコース情報
# @title Video 15: Ethics
from ipywidgets import widgets
from IPython.display import YouTubeVideo
from IPython.display import IFrame
from IPython.display import display


class PlayVideo(IFrame):
  def __init__(self, id, source, page=1, width=400, height=300, **kwargs):
    self.id = id
    if source == 'Bilibili':
      src = f'https://player.bilibili.com/player.html?bvid={id}&page={page}'
    elif source == 'Osf':
      src = f'https://mfr.ca-1.osf.io/render?url=https://osf.io/download/{id}/?direct%26mode=render'
    super(PlayVideo, self).__init__(src, width, height, **kwargs)


def display_videos(video_ids, W=400, H=300, fs=1):
  tab_contents = []
  for i, video_id in enumerate(video_ids):
    out = widgets.Output()
    with out:
      if video_ids[i][0] == 'Youtube':
        video = YouTubeVideo(id=video_ids[i][1], width=W,
                             height=H, fs=fs, rel=0)
        print(f'Video available at https://youtube.com/watch?v={video.id}')
      else:
        video = PlayVideo(id=video_ids[i][1], source=video_ids[i][0], width=W,
                          height=H, fs=fs, autoplay=False)
        if video_ids[i][0] == 'Bilibili':
          print(f'Video available at https://www.bilibili.com/video/{video.id}')
        elif video_ids[i][0] == 'Osf':
          print(f'Video available at https://osf.io/{video.id}')
      display(video)
    tab_contents.append(out)
  return tab_contents


video_ids = [('Youtube', 'Kt6JLi3rUFU'), ('Bilibili', 'BV1Hw41197oB')]
tab_contents = display_videos(video_ids, W=854, H=480)
tabs = widgets.Tab()
tabs.children = tab_contents
for i in range(len(tab_contents)):
  tabs.set_title(i, video_ids[i][0])
display(tabs)
# @title Submit your feedback
content_review(f"{feedback_prefix}_Ethics_Video")# @title Video 16: Be a group
from ipywidgets import widgets
from IPython.display import YouTubeVideo
from IPython.display import IFrame
from IPython.display import display
class PlayVideo(IFrame):
def __init__(self, id, source, page=1, width=400, height=300, **kwargs):
self.id = id
if source == 'Bilibili':
src = f'https://player.bilibili.com/player.html?bvid={id}&page={page}'
elif source == 'Osf':
src = f'https://mfr.ca-1.osf.io/render?url=https://osf.io/download/{id}/?direct%26mode=render'
super(PlayVideo, self).__init__(src, width, height, **kwargs)
def display_videos(video_ids, W=400, H=300, fs=1):
tab_contents = []
for i, video_id in enumerate(video_ids):
out = widgets.Output()
with out:
if video_ids[i][0] == 'Youtube':
video = YouTubeVideo(id=video_ids[i][1], width=W,
height=H, fs=fs, rel=0)
print(f'Video available at https://youtube.com/watch?v={video.id}')
else:
video = PlayVideo(id=video_ids[i][1], source=video_ids[i][0], width=W,
height=H, fs=fs, autoplay=False)
if video_ids[i][0] == 'Bilibili':
print(f'Video available at https://www.bilibili.com/video/{video.id}')
elif video_ids[i][0] == 'Osf':
print(f'Video available at https://osf.io/{video.id}')
display(video)
tab_contents.append(out)
return tab_contents
video_ids = [('Youtube', 'Sfp6--d_H1A'), ('Bilibili', 'BV1j44y1272h')]
tab_contents = display_videos(video_ids, W=854, H=480)
tabs = widgets.Tab()
tabs.children = tab_contents
for i in range(len(tab_contents)):
tabs.set_title(i, video_ids[i][0])
display(tabs)# @title Submit your feedback
content_review(f"{feedback_prefix}_Be_a_group_Video")# @title Video 17: Syllabus
from ipywidgets import widgets
from IPython.display import YouTubeVideo
from IPython.display import IFrame
from IPython.display import display
class PlayVideo(IFrame):
def __init__(self, id, source, page=1, width=400, height=300, **kwargs):
self.id = id
if source == 'Bilibili':
src = f'https://player.bilibili.com/player.html?bvid={id}&page={page}'
elif source == 'Osf':
src = f'https://mfr.ca-1.osf.io/render?url=https://osf.io/download/{id}/?direct%26mode=render'
super(PlayVideo, self).__init__(src, width, height, **kwargs)
def display_videos(video_ids, W=400, H=300, fs=1):
tab_contents = []
for i, video_id in enumerate(video_ids):
out = widgets.Output()
with out:
if video_ids[i][0] == 'Youtube':
video = YouTubeVideo(id=video_ids[i][1], width=W,
height=H, fs=fs, rel=0)
print(f'Video available at https://youtube.com/watch?v={video.id}')
else:
video = PlayVideo(id=video_ids[i][1], source=video_ids[i][0], width=W,
height=H, fs=fs, autoplay=False)
if video_ids[i][0] == 'Bilibili':
print(f'Video available at https://www.bilibili.com/video/{video.id}')
elif video_ids[i][0] == 'Osf':
print(f'Video available at https://osf.io/{video.id}')
display(video)
tab_contents.append(out)
return tab_contents
video_ids = [('Youtube', 'cDvAqG_hAvQ'), ('Bilibili', 'BV1iB4y1N7uQ')]
tab_contents = display_videos(video_ids, W=854, H=480)
tabs = widgets.Tab()
tabs.children = tab_contents
for i in range(len(tab_contents)):
tabs.set_title(i, video_ids[i][0])
display(tabs)# @title Submit your feedback
content_review(f"{feedback_prefix}_Syllabus_Video")講師紹介
1週目: 基礎ブロック
2週目: 実践編
3週目: さらなる魔法
- Tim Lillicrap と Blake Richards
- Jane Wang と Feryal Behbahani
- Tim Lillicrap と Blake Richards
- Josh Vogelstein と Vincenzo Lamonaco
さあ、ICLR論文の可視化$ にアクセスしてみましょう。いくつかの要旨を読み、様々なクラスタを見てみてください。あなたはこのマップのどこに位置すると感じますか?
ボーナス - 60年分の機械学習研究を1つの図に
Hendrik Strobelt(MIT-IBM Watson AI Lab)によるもので、Benjamin Hooverのサポートを受けています。
このノートブックでは、AllenAIのS2ORCデータセットから取得した3,300件の論文のサブセット*を可視化します。各論文は、論文のベクトル表現に次元削減を適用した位置で表されます。ベクトル表現はニューラルネットワークの出力です。
注意: 選択はキーワードや手法のフィルタリングに大きく偏っています。詳細は後述のセクションを参照してください。
# @title Install and Import `altair` and `vega_datasets`.

import altair as alt  # altair is defining data visualizations

# Source data files
# Position data file maps ID to x,y positions
# original link: http://gltr.io/temp/ml_regexv1_cs_ma_citation+_99perc.pos_umap_cosine_100_d0.1.json
POS_FILE = 'https://osf.io/qyrfn/download'
# original link: http://gltr.io/temp/ml_regexv1_cs_ma_citation+_99perc_clean.csv
# Metadata file maps ID to title, abstract, author,....
META_FILE = 'https://osf.io/vfdu6/download'

# data loading and wrangling
def load_data():
  """
  Loading the data

  Args:
    None

  Returns:
    Merged read dataFrame combining id and paper_id;
  """
  positions = pd.read_json(POS_FILE)
  positions[['x', 'y']] = positions['pos'].to_list()
  meta = pd.read_csv(META_FILE)
  return positions.merge(meta, left_on='id', right_on='paper_id')


# load data
data = load_data()
# @title Define Visualization using ALtair
YEAR_PERIOD = "quinquennial" # @param
selection = alt.selection_multi(fields=[YEAR_PERIOD], bind='legend')
data[YEAR_PERIOD] = (data["year"] / 5.0).apply(np.floor) * 5
chart = alt.Chart(data[["x", "y", "authors", "title", YEAR_PERIOD, "citation_count"]], width=800,
height=800).mark_circle(radius=2, opacity=0.2).encode(
alt.Color(YEAR_PERIOD+':O',
scale=alt.Scale(scheme='viridis', reverse=False, clamp=True, domain=list(range(1955,2020,5))),
# legend=alt.Legend(title='Total Records')
),
alt.Size('citation_count',
scale=alt.Scale(type="pow", exponent=1, range=[15, 300])
),
alt.X('x:Q',
scale=alt.Scale(zero=False), axis=alt.Axis(labels=False)
),
alt.Y('y:Q',
scale=alt.Scale(zero=False), axis=alt.Axis(labels=False)
),
tooltip=['title', 'authors'],
# size='citation_count',
# color="decade:O",
opacity=alt.condition(selection, alt.value(.8), alt.value(0.2)),
).add_selection(
selection
).interactive()可視化を見てみましょう。各点は1つの論文を表します。近い点は関連性が高く、遠い点は関連性が低いことを示します。色は論文が発表された5年ごとの期間を示し、点の大きさは2020年7月時点のS2ORCコーパス内での引用数を示します。
このビューはインタラクティブで、以下の3つの主な操作が可能です。試してみてください:
- 点にカーソルを合わせるとツールチップ(タイトル、著者)が表示される
- 凡例(右側)で年を選択して点をフィルタリングできる
- スクロールでズームイン・アウト、ダブルクリックでビューをリセット
chart質問
操作しながら、以下の質問に答えを見つけられますか?
- トピックごとのクラスタを見つけられますか?フィルタリングエラーによるクラスタはありますか?
- データやクラスタに時間的な傾向は見られますか?
- ディープラーニング手法が急増し始めた時期はいつですか?
- DLの「冬」の前に書かれた重要論文で、クラスタのマイルストーンとなるものはありますか?(ヒント:色の異なる大きな点を探してください)
# @title Submit your feedback
content_review(f"{feedback_prefix}_Bonus_Section_Discussion")
手法
実施内容は以下の通りです:
- 以下の条件を満たす論文をフィルタリング:
- 分野が
Computer ScienceまたはMathematics - タイトルまたは要旨に以下のキーワードのいずれかを含む:
"machine learning|artificial intelligence|neural network|(machine|computer) vision|perceptron|network architecture| RNN | CNN | LSTM | BLEU | MNIST | CIFAR |reinforcement learning|gradient descent| Imagenet "
- 各年ごとに、その年の引用数の99パーセンタイル未満の論文を除外
- SPECTERモデルを使い、タイトル+要旨から埋め込みを作成
- UMAPで埋め込みを次元削減
- Altairで可視化
著者を探す
# @title Edit the `AUTHOR_FILTER` variable to full text search for authors.

AUTHOR_FILTER = "Rush "  # @param space at the end means "word border"

### Don't ignore case when searching...
FLAGS = 0
### uncomment do ignore case
# FLAGS = re.IGNORECASE

## --- FILTER CODE.. make it your own ---
data['issel'] = data['authors'].str.contains(AUTHOR_FILTER, na=False, flags=FLAGS, )
if data['issel'].mean()<0.0000000001:
  print('No match found')

## --- FROM HERE ON VIS CODE ---
alt.Chart(data[["x", "y", "authors", "title", YEAR_PERIOD, "citation_count", "issel"]], width=800,
                  height=800) \
    .mark_circle(stroke="black", strokeOpacity=1).encode(
    alt.Color(YEAR_PERIOD+':O',
              scale=alt.Scale(scheme='viridis', reverse=False),
              # legend=alt.Legend(title='Total Records')
              ),
    alt.Size('citation_count',
              scale=alt.Scale(type="pow", exponent=1, range=[15, 300])
              ),
    alt.StrokeWidth('issel:Q', scale=alt.Scale(type="linear", domain=[0,1], range=[0, 2]), legend=None),

    alt.Opacity('issel:Q', scale=alt.Scale(type="linear", domain=[0,1], range=[.2, 1]), legend=None),
    alt.X('x:Q',
        scale=alt.Scale(zero=False), axis=alt.Axis(labels=False)
    ),
    alt.Y('y:Q',
        scale=alt.Scale(zero=False), axis=alt.Axis(labels=False)
    ),
    tooltip=['title', 'authors'],
).interactive()
付録
公式PyTorchリソース:
チュートリアル
ドキュメント
-
https://pytorch.org/docs/stable/tensors.html (テンソルメソッド)
-
https://pytorch.org/docs/stable/generated/torch.Tensor.view.html#torch.Tensor.view (特にviewメソッド)
-
https://pytorch.org/vision/stable/datasets.html (事前読み込み済み画像データセット)
Google Colabリソース:
- https://research.google.com/colaboratory/faq.html (GPU使用に関するFAQなど)
参考書籍:
- https://www.deeplearningbook.org/ (Ian Goodfellow、Yoshua Bengio、Aaron Courville著『Deep Learning』)